
Why spring cleaning still matters
Spring cleaning. The phrase itself feels a little…dated, doesn’t it? Like something your grandmother did. But even in 2026, with all our modern conveniences, the urge to thoroughly clean and refresh our homes persists. And I think it’s more than just tradition. It's about creating a sense of calm and control in our lives. A clean space really does seem to equal a clearer mind, and after a long winter, that’s something most of us crave.
The 2024 decluttering trend hasn't slowed down. Most people I know are still following the basic Marie Kondo rule of keeping only what they actually use. It makes sense to do this in March or April when you can finally open the windows without freezing. It is easier to enjoy the sun when it isn't illuminating a layer of dust on the windowsills.
Local governments often help with the heavy lifting. Santa Clara, California, runs an annual cleanup campaign where they collect bulky items that don't fit in standard bins. Checking your city's waste management schedule for 'free dump days' in April can save you a hundred dollars in hauling fees.
I remember a few years ago, feeling incredibly overwhelmed with work and life. I spent a Saturday just cleaning – really cleaning – and it was amazing. The physical effort was a release, and the feeling of accomplishment was huge. It wasn’t just a clean house; it was a mental reset. That's the power of spring cleaning, even now.
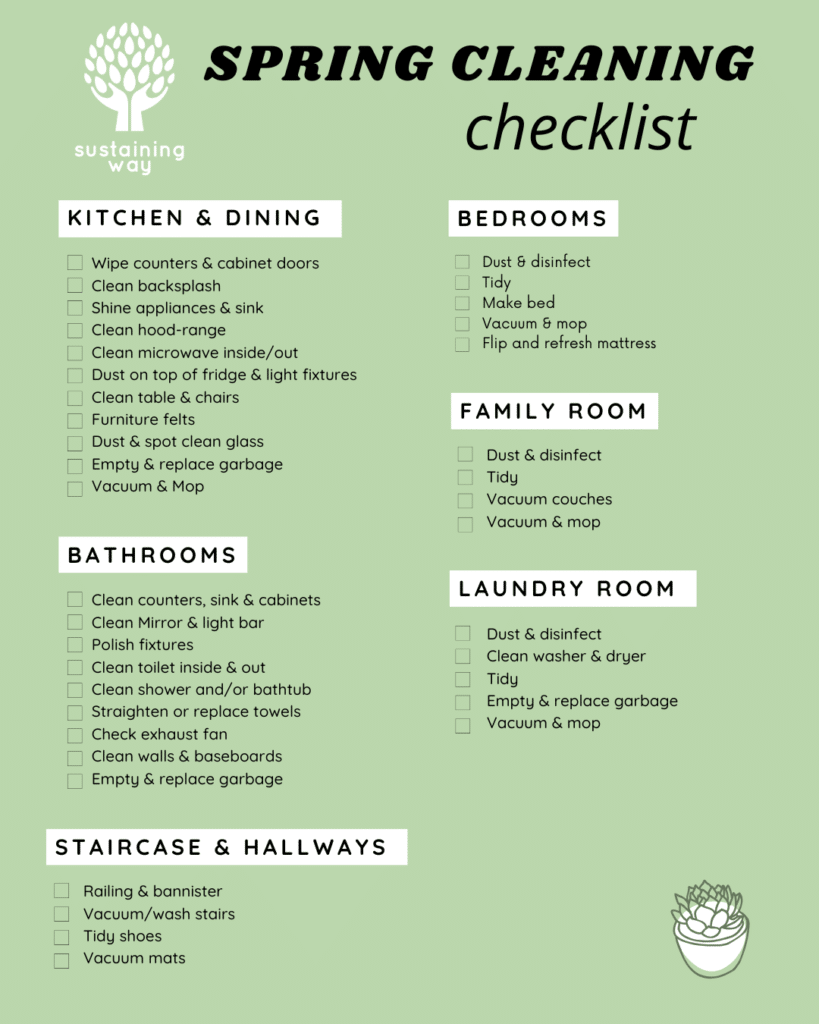
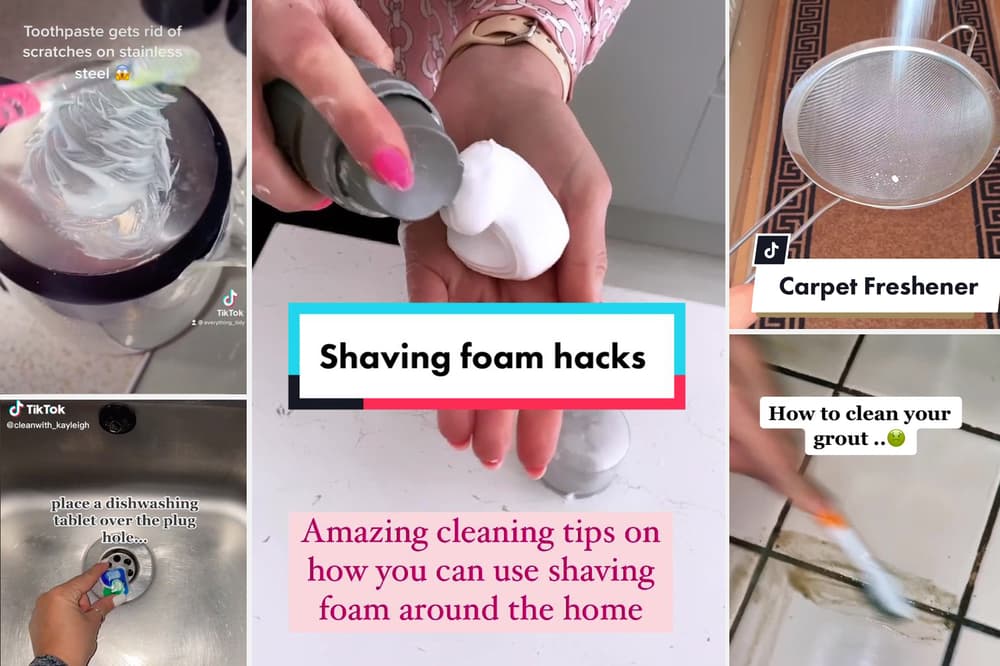
15 essential deep cleaning tasks
These fifteen tasks cover the spots that usually get ignored during a weekly vacuum. I suggest starting with the vents and moving down to the baseboards so you aren't knocking dust onto clean floors.
Floor Type Cleaning Guide
| Floor Type | Cleaning Frequency | Recommended Cleaners | Do's & Don'ts |
|---|---|---|---|
| Hardwood | Weekly sweeping/dusting; Damp mop every 2-4 weeks | pH-neutral hardwood floor cleaner, Wood polish (occasionally) | Do: Use area rugs to protect high-traffic areas. Don't: Use excessive water, steam mops, or abrasive cleaners. |
| Tile | Weekly sweeping/dusting; Damp mop every 1-2 weeks | Tile and grout cleaner, Vinegar and water solution (for some tiles) | Do: Seal grout annually to prevent staining. Don't: Use abrasive cleaners on polished tile, or acidic cleaners on natural stone tile. |
| Laminate | Weekly sweeping/dusting; Damp mop every 2-4 weeks | Laminate floor cleaner, Mild detergent and water | Do: Use felt pads under furniture legs. Don't: Allow water to puddle, use steam mops, or abrasive cleaners. |
| Vinyl | Weekly sweeping/dusting; Damp mop every 1-2 weeks | Vinyl floor cleaner, Mild dish soap and water | Do: Use doormats to trap dirt and debris. Don't: Use abrasive cleaners, wax, or solvent-based cleaners. |
| Hardwood (Engineered) | Weekly sweeping/dusting; Damp mop every 2-4 weeks | pH-neutral hardwood floor cleaner specifically for engineered wood | Do: Follow manufacturer’s instructions for care. Don't: Use excessive water, steam mops, or harsh chemicals. |
| Tile (Porcelain) | Weekly sweeping/dusting; Damp mop every 1-2 weeks | Porcelain tile cleaner, Neutral pH cleaner | Do: Address spills immediately. Don't: Use metal scouring pads or abrasive powders. |
Illustrative comparison based on the article research brief. Verify current pricing, limits, and product details in the official docs before relying on it.
No comments yet. Be the first to share your thoughts!